Getting Started: Installation
Friday, August 22, 2014 12:17 AMRequirements
Intense WordPress Plugin requires WordPress 3.9+
Installation
There are two options for installing the Intense WordPress Plugin: either upload the zip file using the WordPress Plugin Uploader or FTP the unzipped plugin files to the wp-content/plugins folder on your server.
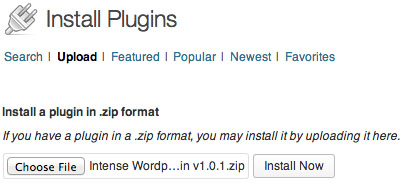
Option 1 - WordPress Plugin Uploader
- Log into the WordPress admin panel
- Go to
Plugins -> Add New - Click the
Uploadlink

- Click and locate the plugin package zip file that was included inside the download
- Click
- Follow the on-screen direction
Option 2 - FTP
- Unzip the zip file that was included with the plugin download
- Once unzipped, you will have a folder titled
intense- this is the plugin content - Using FTP, upload the
intensefolder towp-content/pluginson your server - Log into the WordPress admin panel
- Navigation to
Plugins - Under "Intense WordPress Plugin" click activate

Additional Resources
For complete instructions on installing WordPress plugins, please see the documentation provided by WordPress at WordPress Codex - Managing Plugins.
Required Permissions
Intense requires the ability to write to your uploads directory. These permissions are used to dynamically create a CSS file which includes shortcode CSS styles. If WordPress can upload to this directory, you are likely set up correctly. Over time, you will notice CSS files with names starting with 'intense_' in your uploads directory. These can safely be removed. The dynamic CSS file will be recreated when individual shortcode styles are turned on/off and when the styles change.